- Monday - Friday 8.00 - 17.00
- +420 775 920 521
- racks@varimo.eu
On the page (below), you can find a detailed video tutorial and text description to help you construct your VARIMO shelving racks. In case there is any doubt with any part of the instruction manual, please, contact us, we will gladly explain it to you or fill in the missing information.
Your VARIMO shelving consists of the following components:
1) First identify the individual ends of each upright. The upper end can be identified by the embossed logo on the front side. Place a plastic base on the bottom end and use a hammer or rubber mallet to tap it into place so that the upright settles into the opening of the plastic base. Repeat for all uprights.
2) Place a plastic cover on the upper end of each upright. The cover will be easy to install and you will not need any tools other than possibly a rubber mallet. Once again, repeat for all uprights.
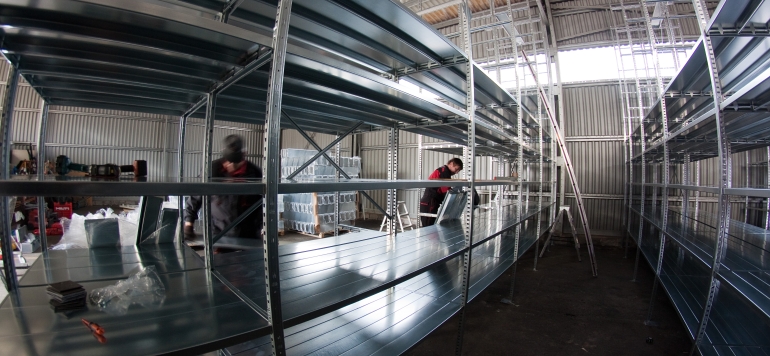
3) The frame of the shelving rack can be assembled by using the crossbar shelf to connect two uprights to each other. The length of the crossbar shelf is determined by the depth of the shelving rack, and the number and placement of the crossbars shelves are determined by the desired spacing of the individual shelves. The crossbars shelves may be fastened using the hooks on the end, which are inserted into the perforations along the side of the uprights. The crossbars shelves may then be tapped into place using a hammer or rubber mallet. The crossbars shelves are then secured from popping back out by using a screwdriver to bend the tabs on the edges of the crossbar shelf into the upright.
4) Now place the assembled frames of the shelving rack into a vertical position at a distance corresponding to the length of the shelves. Take the shelving panels and insert their ends into the spring fasteners in the crossbars shelves and lightly tap them into place using a rubber mallet. The shelves of the VARIMO shelving rack consist of individual panels of various widths which are combined to achieve the desired shelf depth. Repeat for all shelves in the shelving rack.
5) Now install the cross bracing on the back of the shelving rack. The cross bracing is composed of two flat pieces that are secured to the uprights using screws. There are openings prepared in the uprights; select only the proper placement of the cross bracing in the middle of the shelving rack by height. A simple hex key may be used to fasten the cross bracing along with the included socket wrench for gripping the nuts inside the upright.
Once the shelving rack is completely assembled, move it to the desired location and check the technical condition, stability, firmness of joints, and vertical and horizontal levels of the shelving. If needed, you can anchor the shelves to the wall or floor.
Placing a galvanised sheet metal side panels into the shelving rack:
Once the shelving rack frame has been installed, i.e. after placing the crossbar shelves and bases on the shelving rack uprights, place the frame in a suitable position (preferably horizontal). Insert the sheet metal panel into the assembled frame from the top part. This panel then passes through a groove on the inside of the upright. The top covers must be adjusted with a suitable notch for use in the upright.
Placing a galvanised sheet metal panel on the back of the shelving rack:
First, assemble the entire shelving rack (without strengthening beams), then apply a sheet metal filling on the back. It is applied by folding the metal sheet vertically and gradually placing it in the shelving rack. It is necessary to fit it on the sides between the shelf and the projections on the uprights. Secure the metal sheet with strengthening beam elements, evenly spaced at the height of the shelving rack. These elements also serve to reinforce the shelving rack in the longitudinal direction.
We are professionals in the world of shelving racks and warehouse technology. The beginnings of our business in the field date back to 2004, when the market concerning shelving rack systems in the Czech Republic was just being formed. We started out as a trademark, over the years we have developed our own production programme, which covers the complete range of shelving racks as well as the related accessories.
VARIMO Metal shelving racks | © 2018 e-regaly.cz All rights reserved.